Today I knocked out a project that has been sitting on my "To Do List" for a few weeks: A Spool Holder. Spool holders I've seen at the store are just simply too expensive for my novice sewing self. Once all is said and done, I think the project cost me about $5 (not counting the paint, hammer, ribbon and glue which I had on hand). I've seen several homemade versions on the net, but decided to freehand my own interpretation.
As a warning, when I made this again (and I'm sure I will as my spool holder only has 26 pegs and I'm sure to have more than 26 spools at some point in the future), I will do a few things differently. I will point these "lessons learned from experience" as I go along.
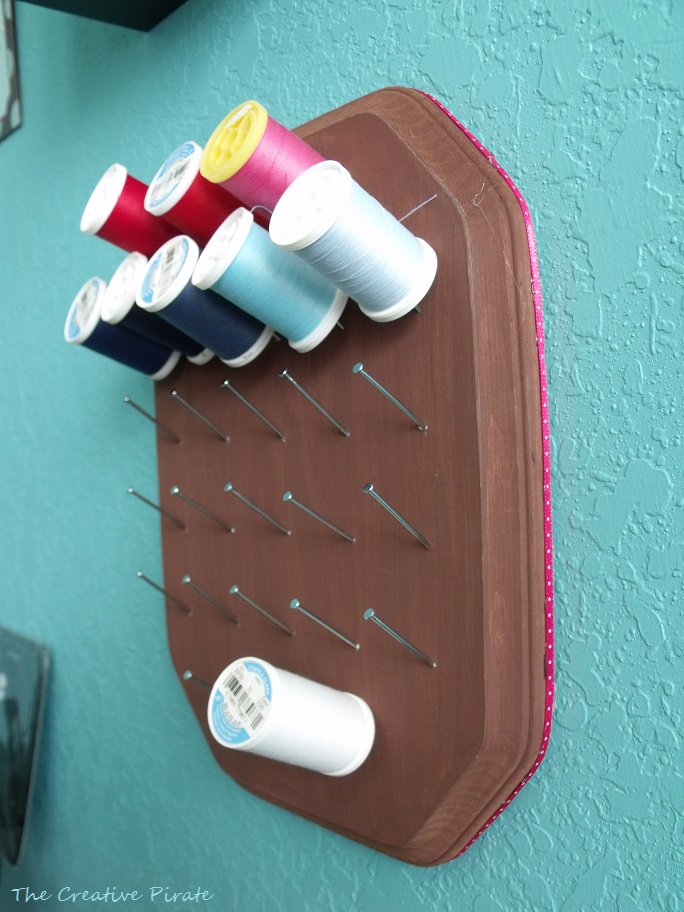
Spool Holder
Supplies needed:
Nails (I used 1-1/2 inch nails...if possible, use longer nails)
A wooden board
A wooden board
Piece of paper as big as the front of your board
Paint
Paint
Hammer
Ruler

Process:
- Gather supplies and paint your board (picture 1). Paint it whatever color you want, this is your project after all. I choose am unexciting brown so as not to interfere too much with the colors of my spools, but that's just my take on the matter.
- Carefully trace the front of your board. If your board is a funny shape like mine is, be careful when tracing. After tracing the board, cut out your shape. This will serve as your template for measuring nail placement. Incidentally, if I were to do this all over again, I would use a basic square or rectangle.
- Using your ruler and pencil (colored pencils really help with this), mark out your squares. Your goal here is to mark out where each spool will go and where it's nail belongs. I discovered that most spools fit inside a 1-1/2 inch square. Based on that, and my funny shaped board, here's how I made my template:
- I measured length and width of my board's surface. Because it's a weird shape, I couldn't just start marking off a grid...first I had to figure out where to start my grid. Those are the gray lines around the outside of my grid in picture 2.
- Starting inside this new rectangle, I used a blue pencil to mark off 1-1/2 squares.
- I used a green pencil to create lines 3/4 of an inch from each side of my squares. This finds the middle of each spool's square.
- To make things easier for me, I used a red pencil to mark where each green line intersects. These dots are where my nails will go.
- Picture 3 shows me carefully lining my template onto my board and securing it with tape. This will keep the paper from slipping around while I'm hammering in the nails.
- Carefully hammer in nails at each of your designated points (picture 4). I hammered mine in at a slight angle since I will hang this on a wall and an angel will prevent the spools from slipping off. However, I think my slight angle was a bit too big. Next time, I'll be more subtle in my slanting efforts.
- Picture 5 shows how my board looked after I nailed in all the nails. Note, you don't want to hammer the nails in to far. Just nail them in until they are firm and don't wiggle around. This doesn't take much!
- As I am going to eventually make several more of these, probably on the same kind of board because I like making my life difficult, I decided to save my template. (Too much math for me to want to do that again!) Hence, picture 6 shows me slowly and carefully removing my template from the nails and board. I used the ruler under each row to help lift the paper and I pulled in the direction the nail heads pointed. If you do not want to save your template, just remove it from the board without disturbing your nails.
- Finally, decorate if you would like! I hot glued a narrow pink and white dotted ribbon around the edge of mine. Apart from ribbon, consider gluing buttons, adding stickers, rhinestones, or glitter...whatever floats your boat.
Until next time!

